
Working efficiently with Fikus
How to machine open pockets in a 3D part
This tip proposes to the user the machining of open pockets with 3D parts in Fikus St.
When machining a part designed by means of surfaces, we always have two strategies available: Roughing and finishing surfaces or using 2D machining strategies. The former is much faster to perform on the CAM, but less efficient on the machine. 2D machining strategies further optimize machine performance. And if the latter is going to be our machining strategy, we are going to find many "open pockets". How do we define them and how do we mechanize them? Next we will see it with an example.
- We will activate the MILL CAM module.
- We will create a New trajectory (user defined values).
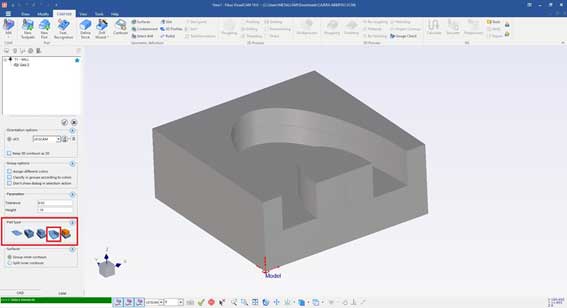
- We will click on the 2D Contours in the part icon in the main CAM bar. (after defining user-defined values).
- We will select the Open Pocket function that appears in - Type of part -, as shown in the image below.

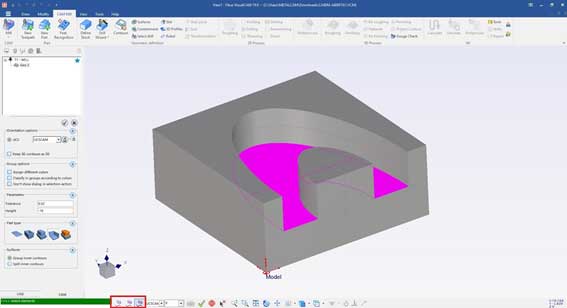
Selection of the elements that make up the 2D contour that make up the open Pocket:
- We will deactivate the filters by leaving the Surface Filter active in the Status bar.
- We will select the surface by clicking on the face as it appears in the image.
- We will confirm the selection with the central button. In this way all the contour formed by the selected surface will be defined as the 2D contour.
Selection of the closed sections that form the 2D contour that make up the open pocket:
- We will deactivate the Surface Filter and activate the Wire Filter.
- We will select the entire 3D part by window.
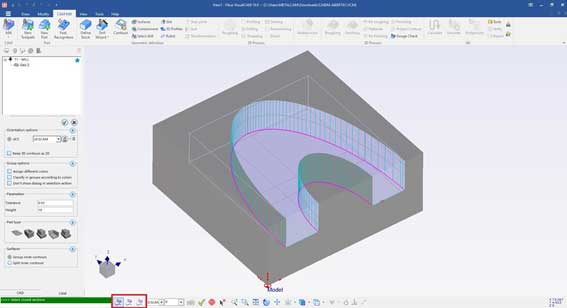
In this way we have selected all the 2D contours defined in the previous step of element selection.
- We will deselect the elements of the open sections, pressing the space bar and selecting the entities.
- We will confirm the selection by means of the central button in this way we end the 2D Contours function.
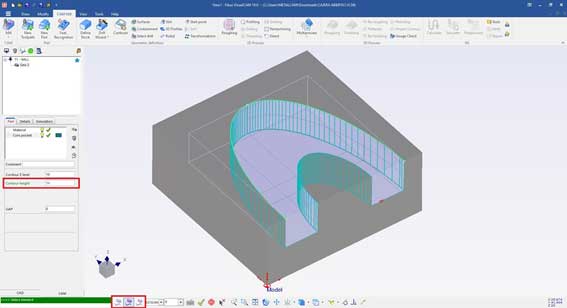
Once we have reached this point, we only need to define the height of the pocket. The contour level will be the value of the corresponding height of the plane that coincides with the bottom of the pocket. This value is automatically defined in this type of pocket.
To define the Height of the pocket:
- We will deactivate the Wired Filter and activate the Filter of contours of the surfaces.
- Activate with the cursor the white data entry area of the Height field.
- Select the element (any) of the upper contour that defines the height of the open pocket.
Once the height of the pocket has been defined manually (height of value 10) then we find the following result.
Apply a roughing process and calculate its path:
- We click on the icon of Roughing in Processes, inside the main CAM bar.
- We configure the options according to the user's preferences.
- We select the roughing process already defined by the user.
- Select the option Calculate in CAM within the main CAM bar or by clicking on the process with the right mouse button, a drop-down menu will appear where you can choose this option.
According to our preferences, the calculated trajectory will look similar to the following screenshot:
In this way we will have quickly defined an open pocket in a 3D part.
Tip by Joan Ginabreda


